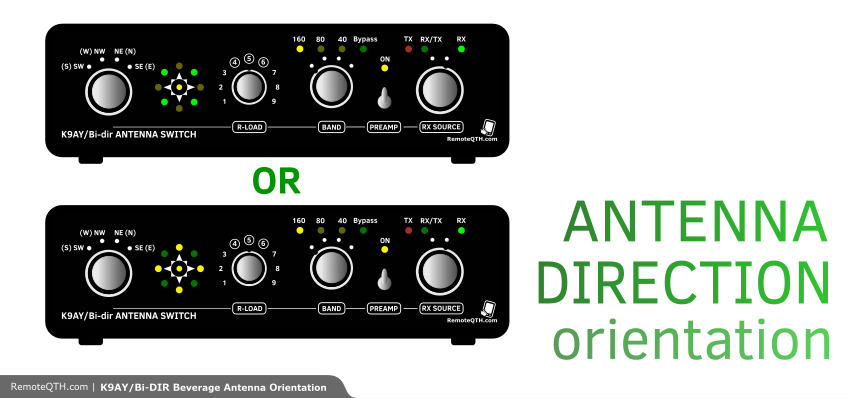
K9AY and Bi-dir beverage controller
This revision is from 2021/04/23 21:29. You can Restore it.
last revision 11-2020 by OK2ZAW
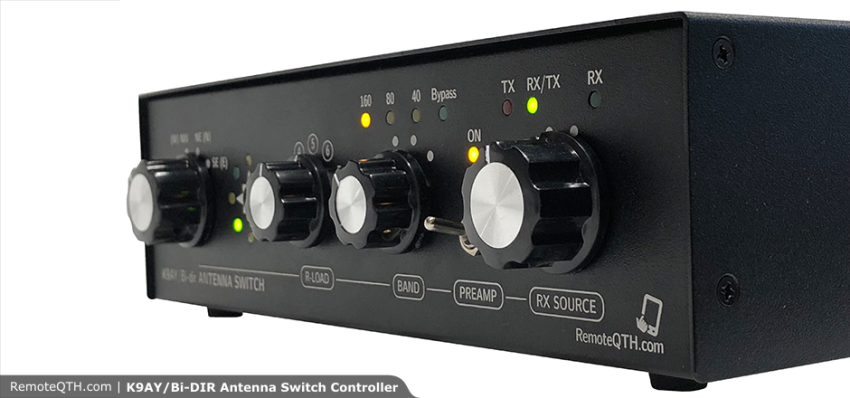
K9AY and 4-way Bi-dir beverage Controller
- This controller allows you to control:
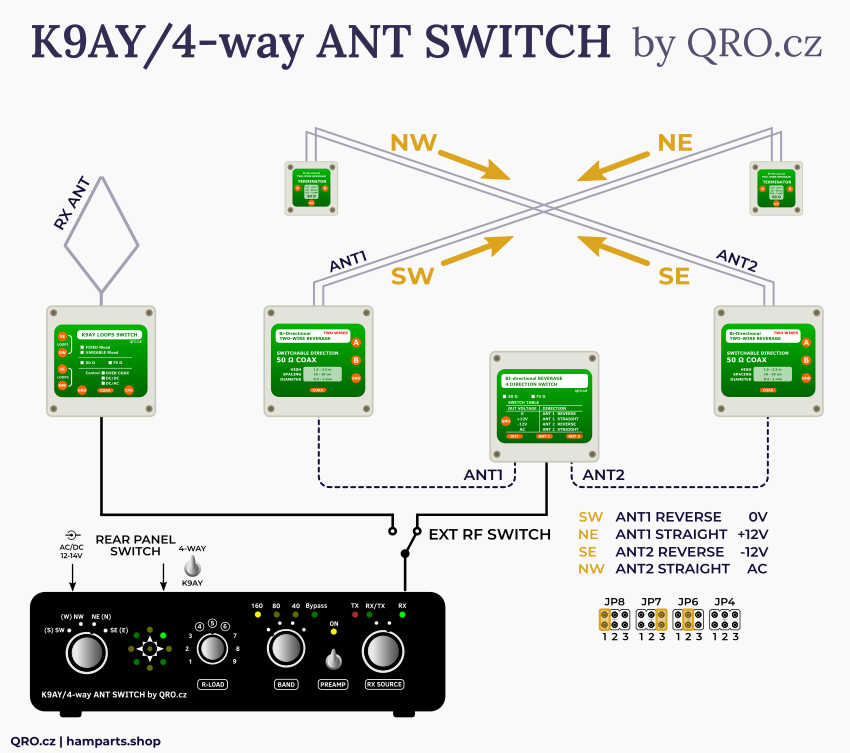
Controller
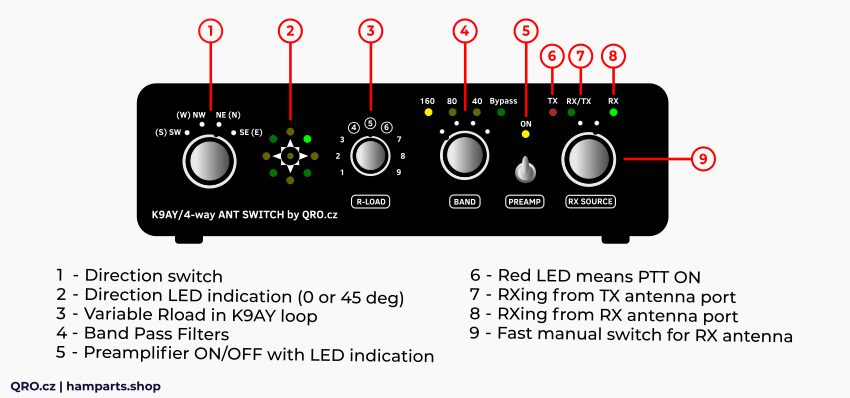
Quick Start Guide
RX ANT WAY switch
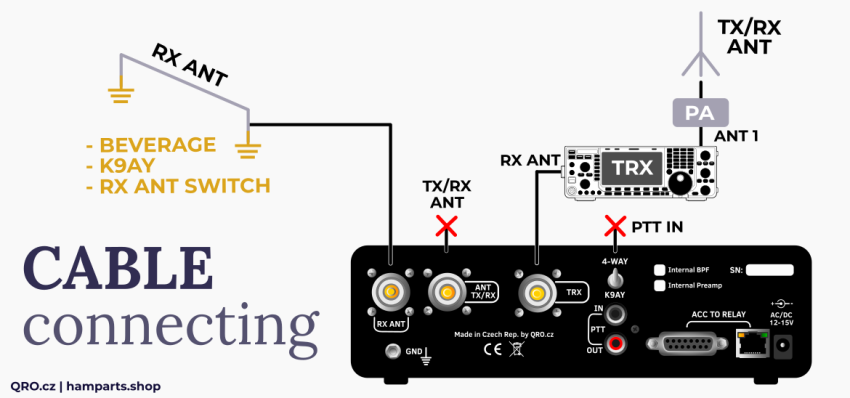
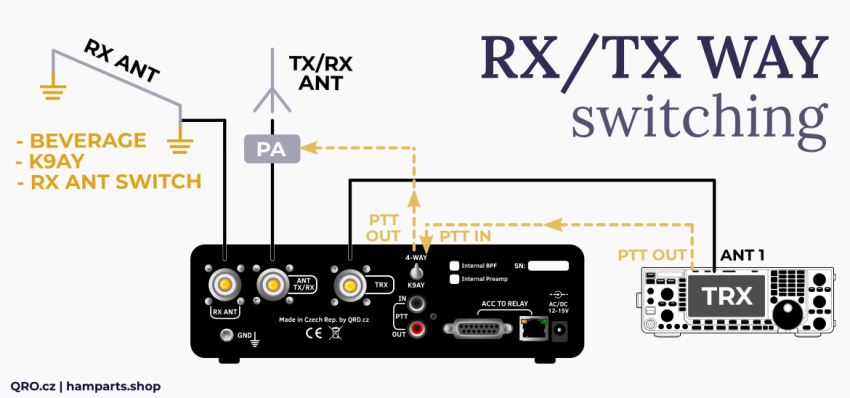
- There are two ways how to connect your RX antenna controller to your TRX (RX).
Add 1:
⚠ MUST be RX ANT ONLY PORT on TRX, no TX!!!
- RX ANT IN and OUT on your TRX:
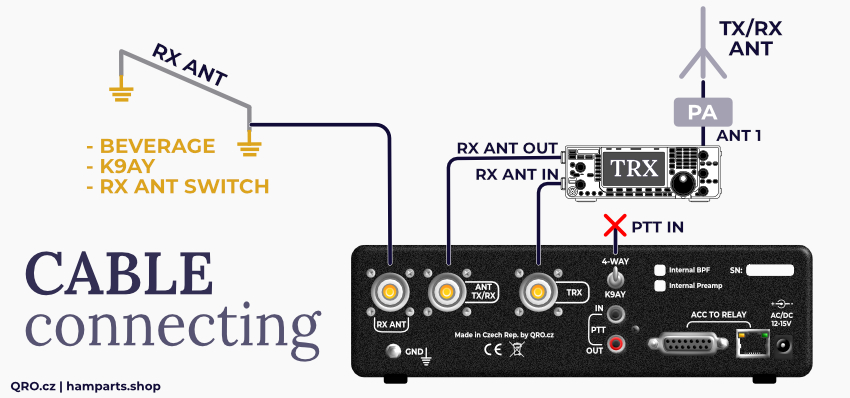
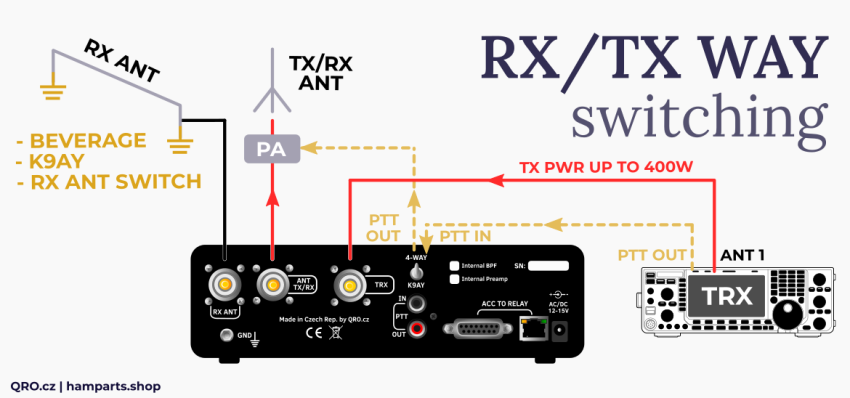
Add 2:
TX signal way during TXing:
⚠ NOTE: RED LED TX must light ON when you TX!!! Do not forget to connect PTT RCA cable from TRX to Controller
- You can use RX antenna switch on Controller.
- this is ideal for TRX without RX only antenna port
- also for the rest TRX for fast RX antenna switching
- fast switching between TX antenna and RX antenna by knob on Controller
- If you want to use this feature you MUST use PTT IN to control relay for TX antenna!
- There is easy PTT loop on rear panel between two RCA connectors.
- PTT control works only in sniffer mode.
- PTT can continue to your PA over this box.
- works also when the controler is OFF
- there is no delay
- compatible with 5V PTT logic (as OM-power PAs)
⚠ NOTE: PTT must be used!!!

RX SOURCE knob for fast switching of the RX way
⚠ NOTE: RED LED TX must light ON when you TX PTT!!!
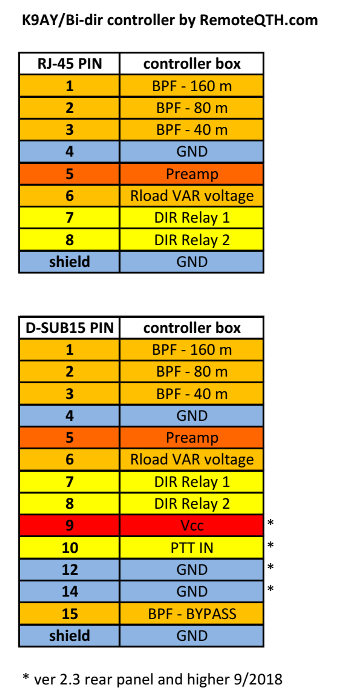
Connectors
- There are two ACC connectors
- RJ45 and SUB-D
- First 8 wires are the same.
- Please read this instruction, use ONLY Copper wires
⚠ NOTE: RJ45 is NOT LAN connection!!!
Jumpers settings
K9AY or 4-way Bi-DIR switching matrix
- Select between switching matrix.
- K9AY and 4-way Bi-dir system do have different switching matrix table.
- bigger picture

K9AY over coax
- This is for simply K9AY not for K9AY++ (there is switching over the control cable)
- SHORT jumpers for K9AY direction switching over the coax
- bigger picture

4-way Bi-DIR beverage settings
- SHORT jumpers for right 4-way Bi-DIR beverage orientation. More here:link
- bigger picture

ANT Rload fine tune
- This is function is only for K9AY feeder with Variable Rload part.
- There are two ways for fine tunning of Rload.
- Please check some more info about Feeder box of K9AY++ on this link
⚠ NOTE: Final Rload resistance may vary with the direction switching. This is caused by thin GND wire between controller and RF feeder box. If the changing is lower than 10 % than all is OK, if more, than more GND wires are recommended. Using CAT-5 FTP (shielded) cable can be big advantage in this problem.
⚠ NOTE: For final tunning and measuring, please connect control cable as well also the coax one!

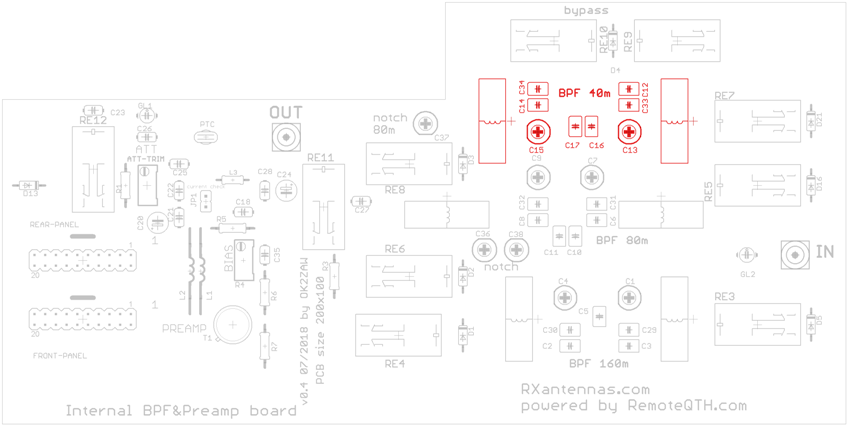
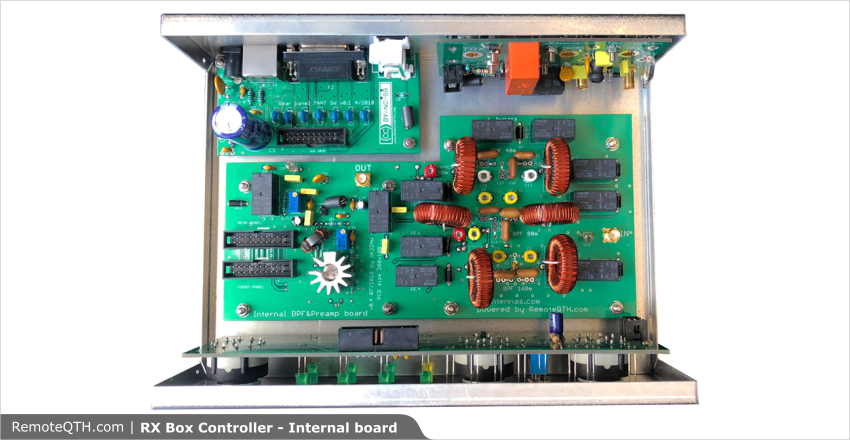
Internal BPF and preamp PCB
This board is only in 4-way system controller. In K9AY++ set all this BPF and Preams are in K9AY++ feeder.
- It means that if you want to use K9AY++ controller also for 4-way beverage system, than you will have BPFs and Preamp ONLY for K9AY++
- If you want yo use this internal PCB board, than it is better to buy 4-way system controller + simply K9AY feeder.
Preamplifier GAIN
- With the variable ATT you can set gain of the Preamp as you need.
- Range is 0 to 17 dB
- bigger picture
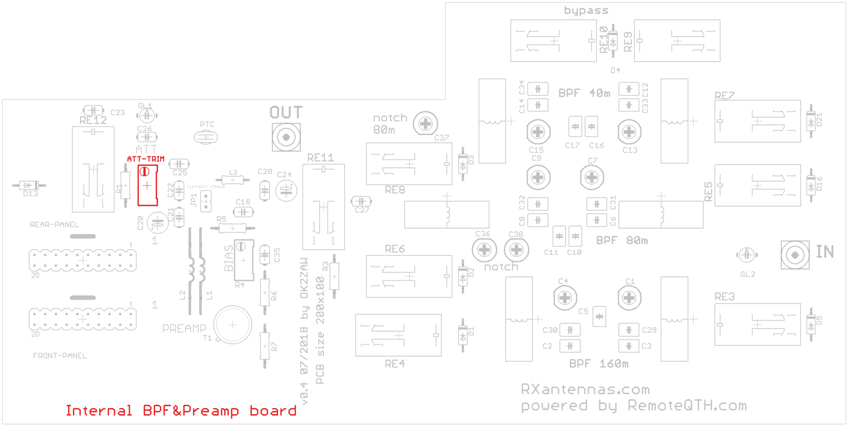
Preamplifier BIAS
- With this trimmer you can set right bias for the transistor.
- Bias vs IP3 and gain parameters are there: OK2ZAW's blog spot
- recomended bias is 45 to 70 mA for 13 V+
- bigger picture
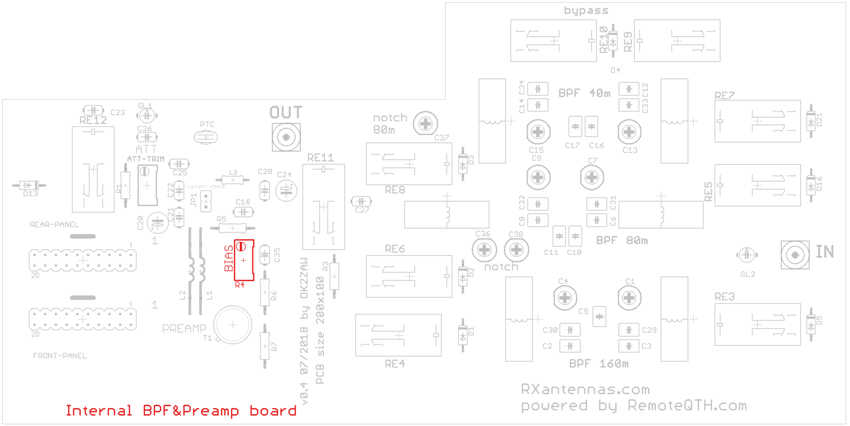
BPF bypass
- You can use one of three BPF (160, 80 or 40m) or you canByPass it for wideband operation
- Controller by switch on the front panel - number 4 on controller
- bigger picture
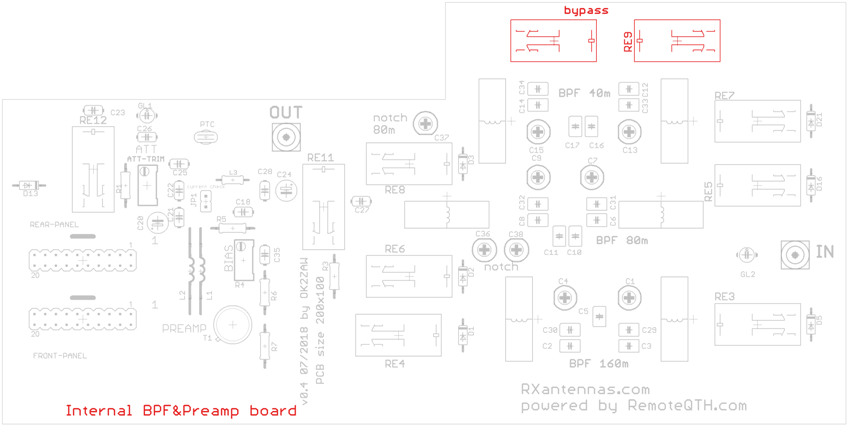
BPF 160M
- 160M BPF selected by controller.
- Switch on the front panel - number 1 on controller
- bigger picture
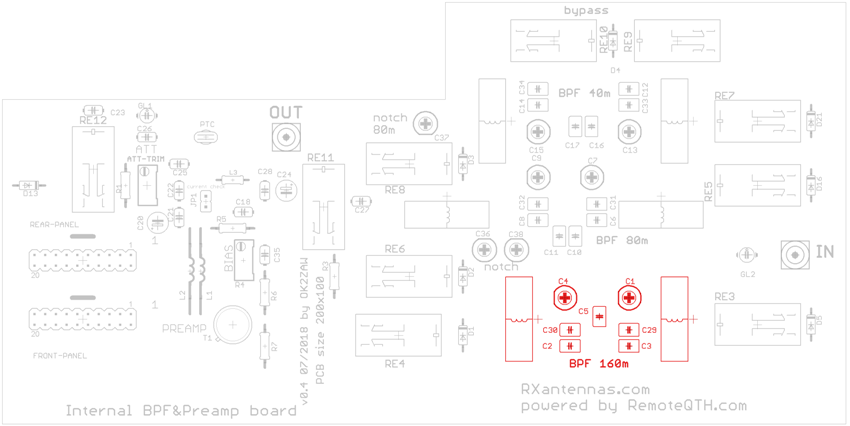
BPF 80M
- 80M BPF selected by controller.
- NOTCH filters are included, nulls 160 and 40m.
- Switch on the front panel - number 2 on controller
- bigger picture
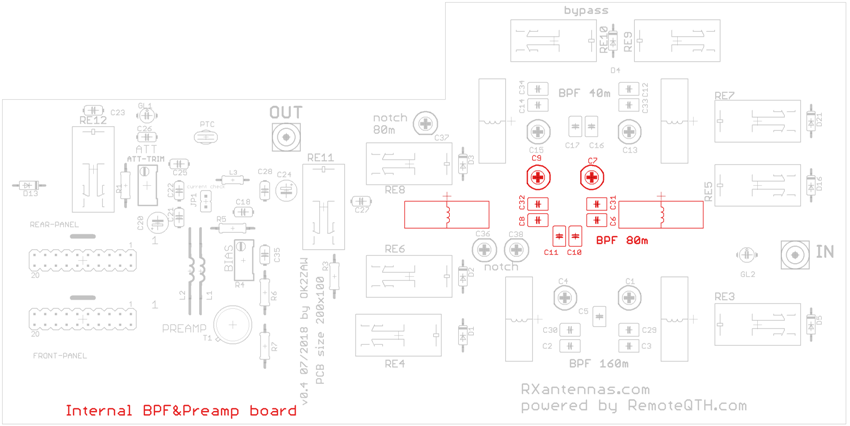
BPF 40M
- 40M BPF selected by controller.
- NOTCH filter is included, nulls 80m.
- Switch on the front panel - number 3 on controller
- bigger picture
