Arduino MEGA 63 relay Web switch
PCB
Setup
you need this components:
- Arduino mega
- Arduino Ethernet shield W5100 (no, W5500 is not supported yet)
- micro SD card, take a small 2-4GB card (or 128MB - there is just 1 file on it)
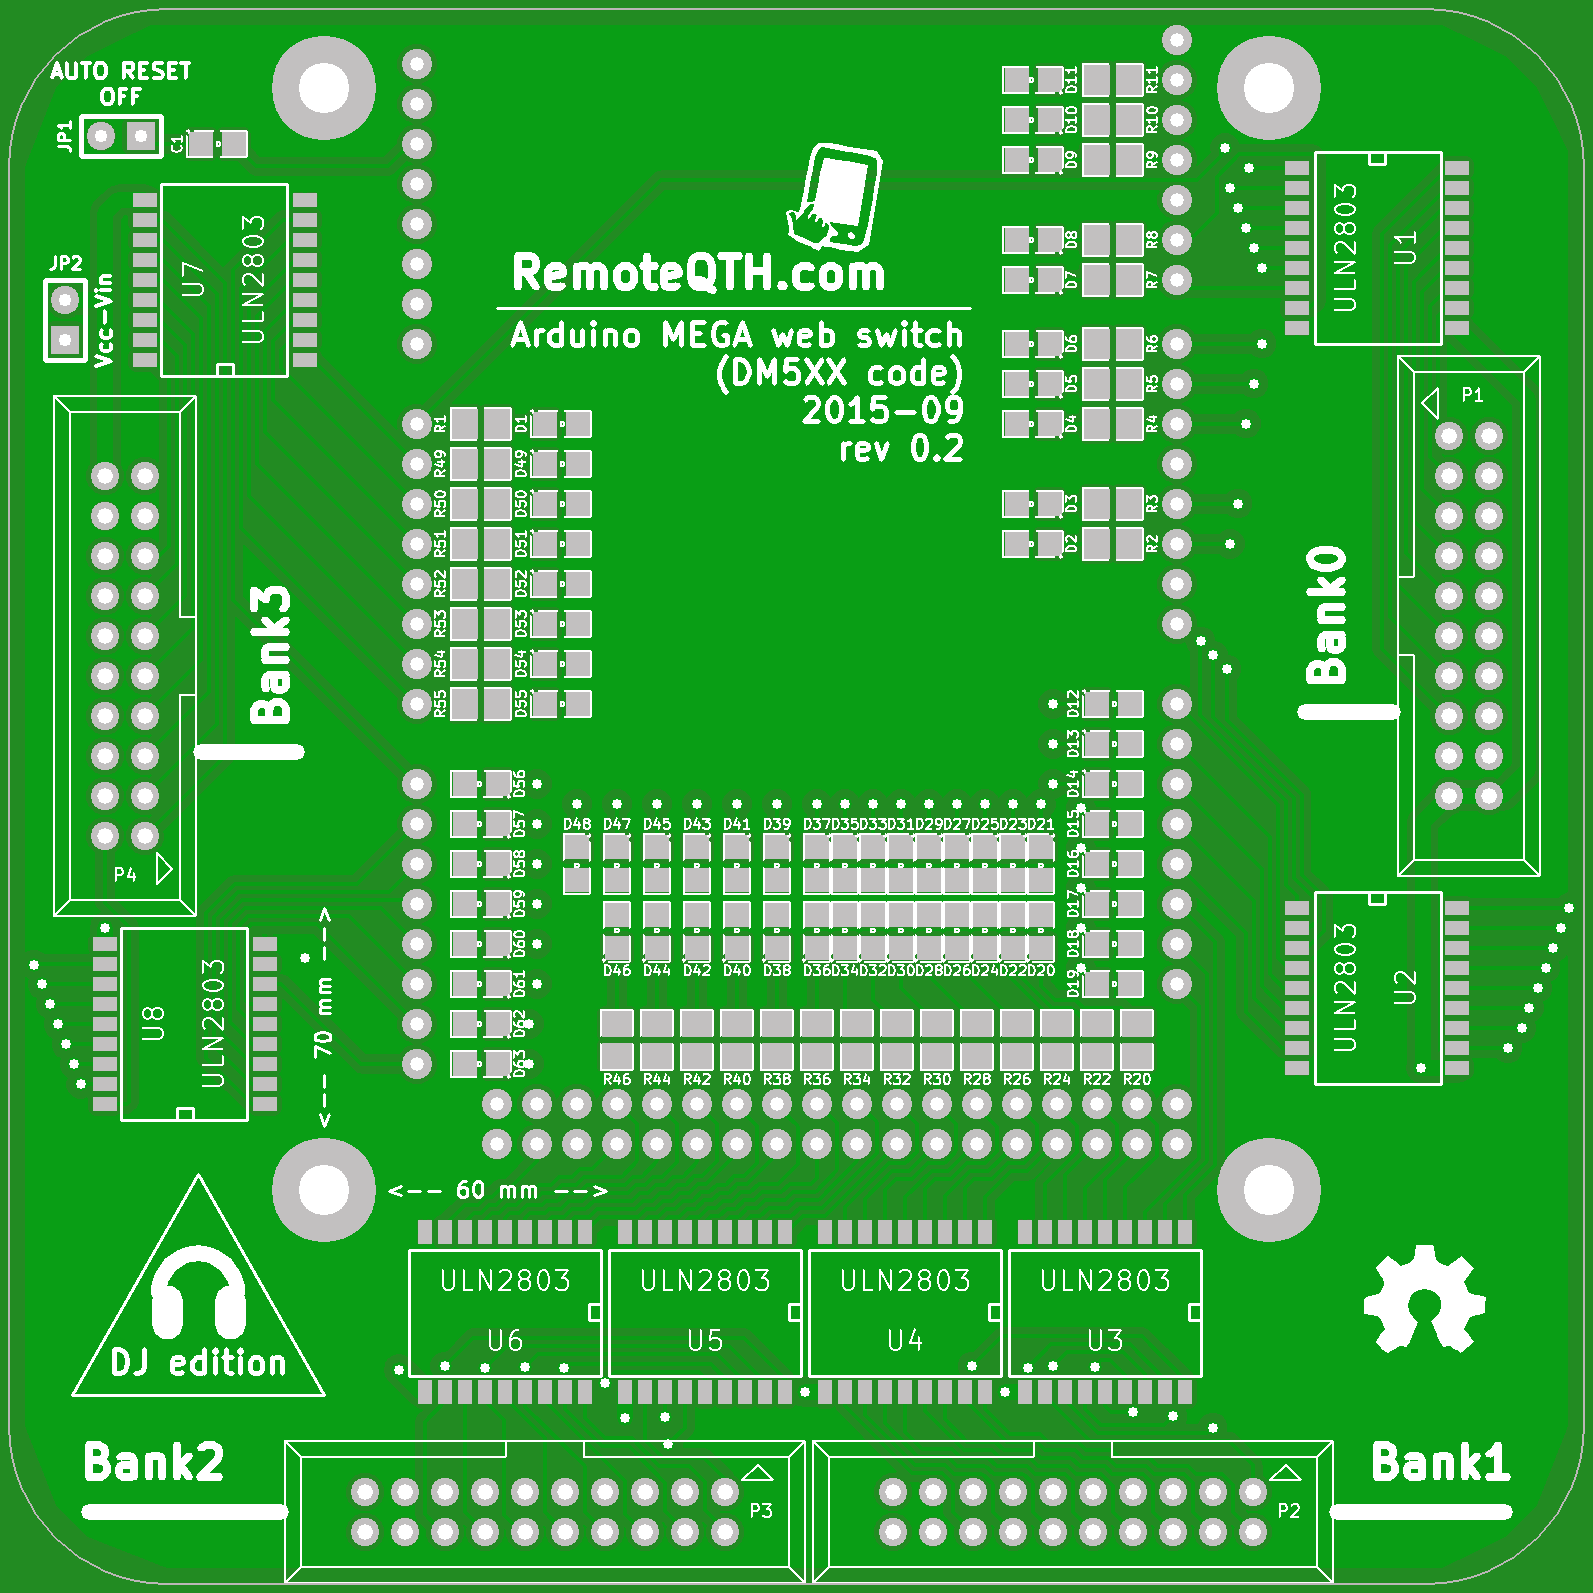
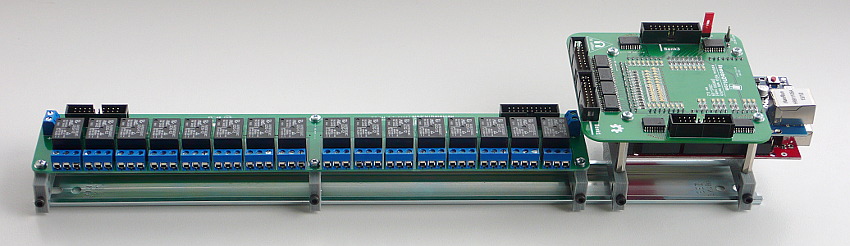
- Main board 63 relay Web switch board / kit
- Power supply (5V to USB or up to 12V in DC plug - 9 V fits best)
- Four relay board controlled by grounded input (Bank0-Bank3) - MAX +50V DC / 500 mA per relay.
- Bank0 16 outputs
- Bank1 16 outputs
- Bank2 16 outputs
- Bank3 15 outputs
Hardware
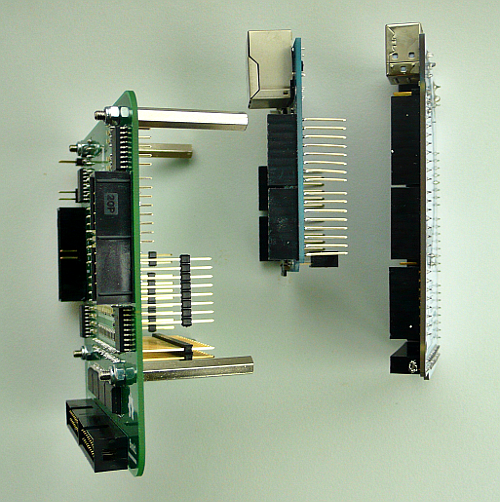
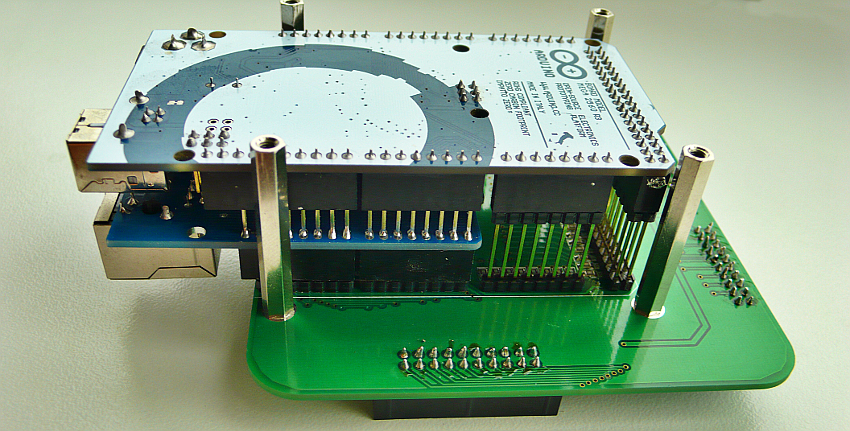
Compose individual parts

✔ Main board + Ethernet shield + microSD card + Arduino MEGA
✔ How to deploy
The idea behind this multi multi switch is, that if you own a bigger station, you want to control everthing...
Switching on Radios, PA, Antenna Switches, Webcams, ... all want you can switch by a relay, the webswitch is able to control! This web switch will grow with your station setup!
But what if you have to press a button for 5s to turn on an amplifier... Or if you have to define a group of buttons, which belong together like switching your 80m coil from cw to midband or ssb?
This is the webswitch! To be faster than normal, the idea is to move all the needed javascript and css files to a webserver. Therefore you need to upload them to your webserver and change the urls in the config. You dont have a webserver? No problem! Use local path, but see the reminder down below...
Here comes the config...

Before you plug the micro SD card into the ethernet shield, format, configure and upload the file config.cfg from the downloaded repostory. Remember: All settings of the SD card will overwrite the sketch data. IMPORTANT: The count of the comma separated values is always 16! Start counting by 0....15, not by 1... :P If you mess up the config by using the wrong positions, it will have a strange behaviour, so be careful...
Here is the description of the values (dont copy the content below, use a text editor and edit the config.cfg from the repository)
[ajaxUrl=https://192.168.1.179]
=> this is the url, the webclient will call. It coun be in your local network (that its the same as you
deviceIp) or its a dynDNS url like dm5xx.dynden.org:8888 to call it via the internet.
[deviceIp=192.168.1.179]
=> your device's ip-adress. Choose a free one! Depending on your local network.
[gatewayIp=192.168.1.40]
=> If your network has a gateway (router) to reach the internet, please use the gateways ip here
[title=DM5XX]
=> Give the web client page a meanful title. This will be shown in your browser...
[jsUrl=https://h.mmmedia-online.de/mega_webswitch.js]
=> This is the url to the javascript file you have to place on a webserver. Or.. You change this to be on your
local machines filesystem - this can be also a path! If you have problems
see https://github.com/mrdoob/three.js/wiki/How-to-run-things-locally.
So change this to file:///C:\your_directory\mega_webswitch.js. You need to modify the labels in the
javascript file, so you need to customize the js file...
[cssUrl=https://h.mmmedia-online.de/mega_webswitch.css]
=> Same fun this the css, but no need to change something... Only if you want to...
[faviconUrl=https://h.mmmedia-online.de/favicon.ico]
=> Change this to get a different favicon - the little green alien head.. But it would be nice to leave it
untouched...
[dotUrl=https://h.mmmedia-online.de/dot.png]
=> Url to the png image of the green blinking circle.. Everytime this circle is blinking, the button status is
updated.
[jqueryUrl=https://code.jquery.com/jquery-1.11.2.min.js]
=> Dont change this. Its just the url to the jquery lib.
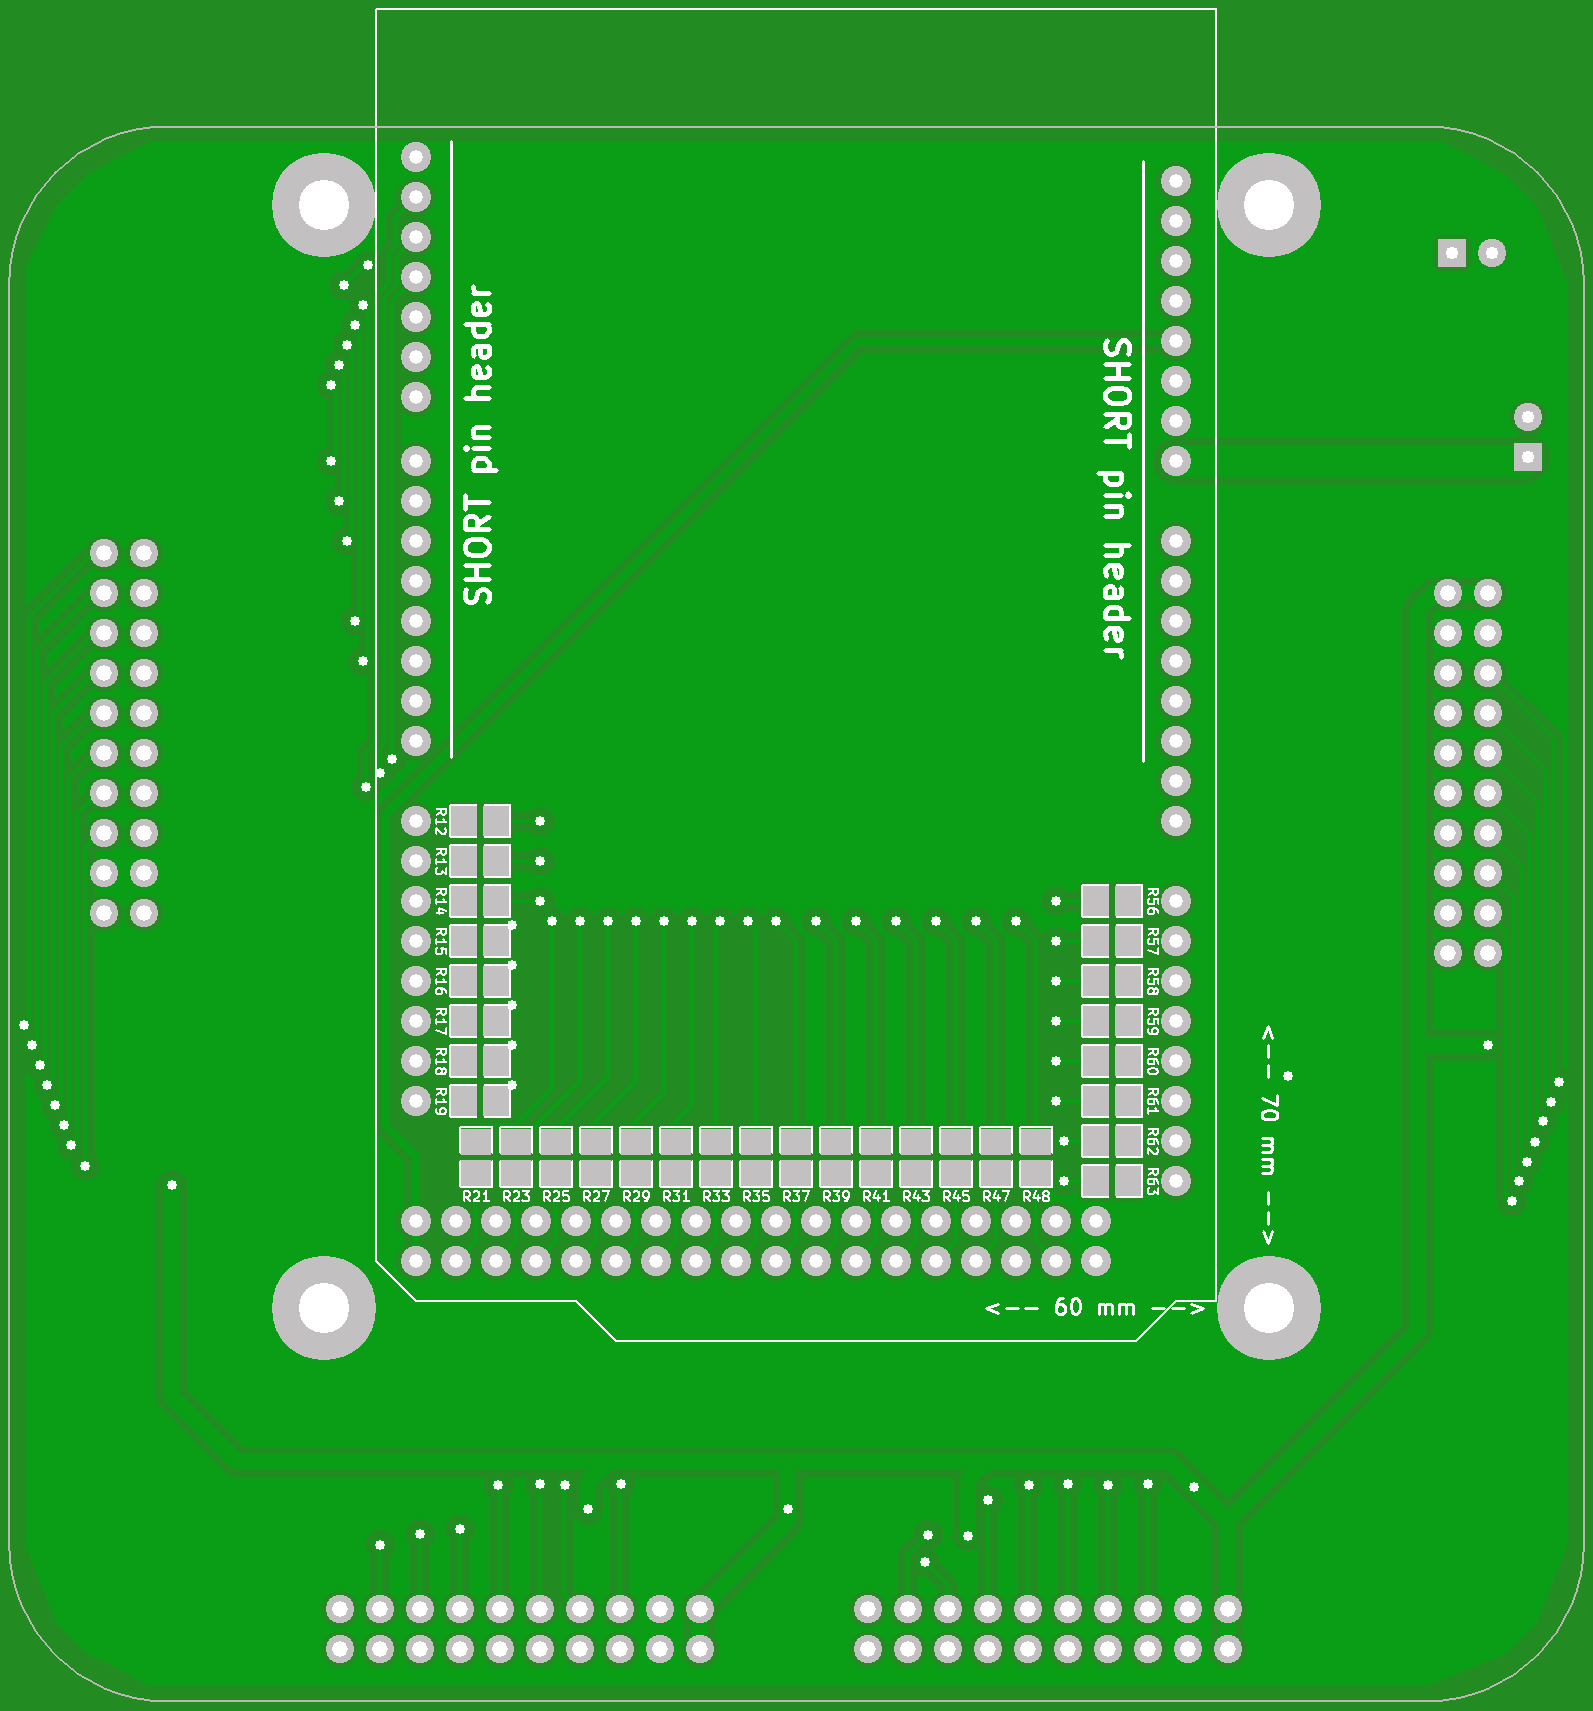
[strpinsBank0=54,2,3,5,6,7,8,9,11,12,13,14,15,16,17,18]
[strpinsBank1=19,20,21,22,23,24,25,26,27,28,29,30,31,32,33,34]
[strpinsBank2=35,36,37,38,39,40,41,42,43,44,45,46,47,48,49,53]
[strpinsBank3=55,56,57,58,59,60,61,62,63,64,65,66,67,68,69,1]
=> Here the pins are defined, which belon to a bank. Feel free to change it, but maybe its ok to leave it for
the moment...
[stris5sPinBank0=0,0,0,0,0,1,0,0,1,0,0,1,0,0,0,0]
=> the 6th Button from bank 0 is a long-on-hold button. Look to strPinsBank0: Its pin 7 by the way... And so on
[stris5sPinBank1=0,0,1,0,0,0,0,0,0,1,0,1,0,0,0,0]
[stris5sPinBank2=0,0,1,0,1,0,1,0,1,0,0,0,1,0,1,0]
[stris5sPinBank3=0,0,0,0,0,0,0,0,0,0,0,0,0,0,0,0]
=> here you define, which of the buttons is a "long"/"hold" button. 0 for no, 1 for yes...
[strisOffPinBank0=0,0,0,0,0,0,1,0,0,1,0,0,1,0,0,0]
[strisOffPinBank1=0,0,0,1,0,0,0,0,0,0,1,0,1,0,0,0]
[strisOffPinBank2=0,0,0,1,0,1,0,1,0,1,0,0,0,1,0,1]
[strisOffPinBank3=0,0,0,0,0,0,0,0,0,0,0,0,0,0,0,0]
=> here you define, which of the buttons is a button who switches another button OFF. 0 for no, 1 for yes...
[strindexOfOffPinPairBank0=0,0,0,0,0,0,5,0,0,8,0,0,11,0,0,0]
[strindexOfOffPinPairBank1=0,0,0,2,0,0,0,0,0,0,9,0,11,0,0,0]
[strindexOfOffPinPairBank2=0,0,0,2,0,4,0,6,0,8,0,0,0,12,0,14]
[strindexOfOffPinPairBank3=0,0,0,0,0,0,0,0,0,0,0,0,0,0,0,0]
=> But who belongs together? This is defined here... the 7th button from bank 0 switches the button off
who is on postion 5 in this example... ATTENTION: The count starts with 0... not with 1!
[strpushDurationBank0=0,0,0,0,0,5,1,0,5,1,0,5,1,0,0,0]
[strpushDurationBank1=0,0,1,1,0,0,0,0,0,5,1,1,1,0,0,0]
[strpushDurationBank2=0,0,5,1,1,1,5,1,1,1,0,0,5,1,5,1]
[strpushDurationBank3=0,0,0,0,0,0,0,0,0,0,0,0,0,0,0,0]
=> Here you define, how long a button/relay remains active. After that period in s, the relay is switched off
[strToken=Abcdgfghij123!#*]
=> Store the password from SecuGenerator.html here (must be the same!). Must be exact 16 characters dont use [ or ] or ' or " or / or \ or { or } or =
[intSalt=3333]
=> Use SecuGenerator.html to define a salt number (must be the same!). Try 2-5 digits. Store it here and in mega_webswitch.js (var salt = ur_value)

❏ microSD plug to Ethernet shield and deployed to Arduino MEGA
❏ then connect to Main board
Configure jumper
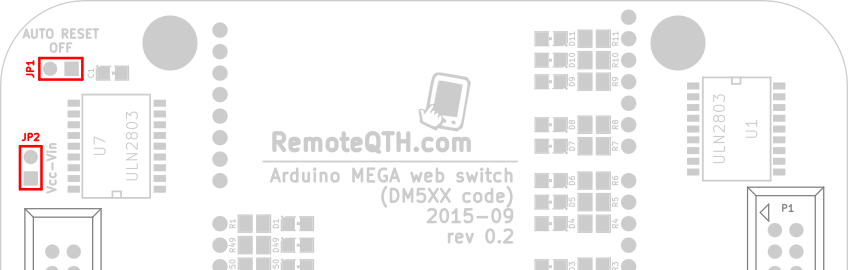
- JP1 - short disable auto reset from USB (must be open at upload firmware)
- JP2 - short connect power between Arduino DC input and power on Relay board - WARNING to maximum voltage Arduino Mega
How to connect your own relays

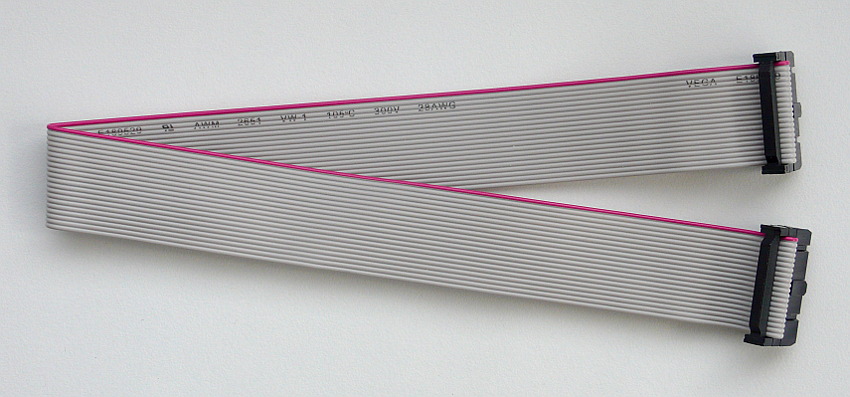
Large relay board flat cable
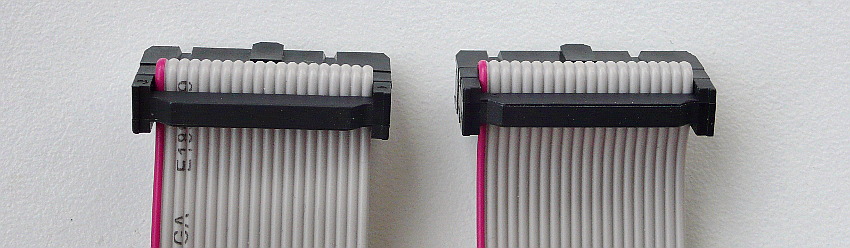
❏ Pressing two connector to flat cable - attention to the orientation, both ends must be in same orientation compared to red wire in cable.
Mounting to DIN rail
Firmware
- For beginners Getting Started with Arduino
- You can download and configure firmware from master tree GitHub
- Run the file SecuGenerator.html in your Browser. Choose an exactly 16 character long password and a salt value with 2-5 digits (see hints for pwd and salt generation in the file - but SecuGenerator.html has an error, use description what to store where down below)
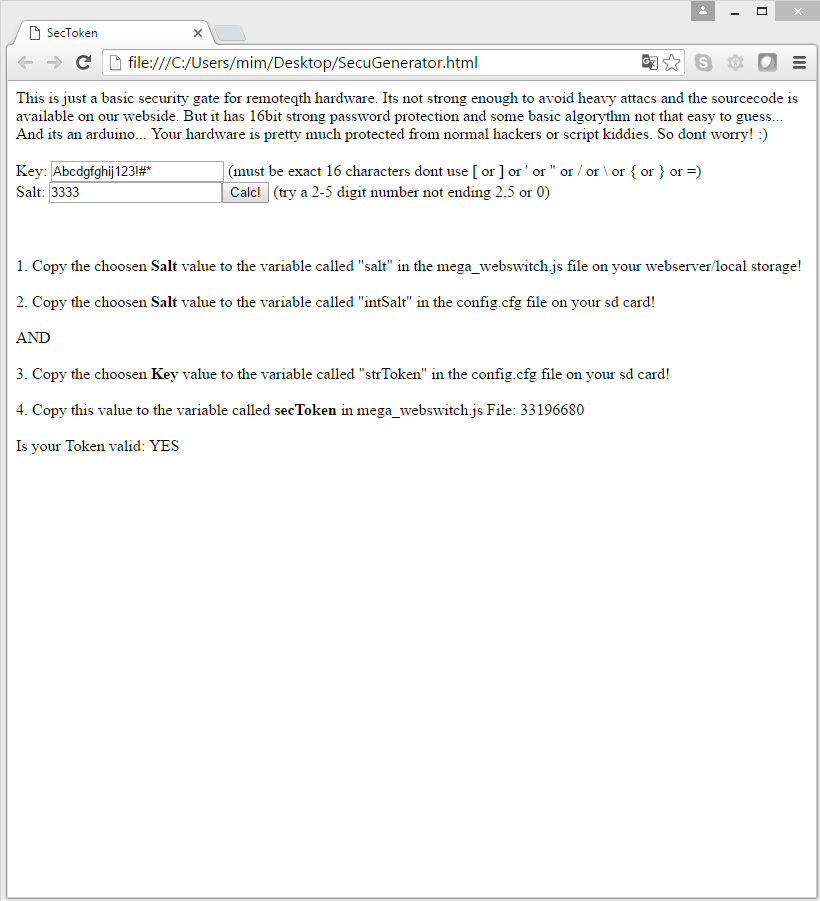
- Copy Key to the config.cfg to a variable named strToken
- Copy Salt to config.cfg to a variable named intSalt'''

- Copy Token to mega_webswitch.js to a variable named secToken. WARNING: If your token is not valid, it says ...valid: NO :)
- edit config.cfg, copy the file to the microSD card and plug it into the Ethernet shield
- Download Arduino IDE
- Unzip and copy the 2 libraries Hashmap and Time to your Arduino libraries folder ( eg .../documents/ardion/libraries)
- open.ino''' file, compile and upload to Arduino MEGA - normally no need to change settings in the sketch if you configure the config.cfg
Configure firmware - The default entries. Some of them are overwritten by config.cfg - If you want to have more than 1 webswitch active, change the mac adress. But since you are using a sd card, nothing to change in the sketch itself :P See the sketch (.ino) for info whats going on...
So if everything is configured fine, you can call the MEAG 63 relay Web switch from your browser by https://<device_ip_adress>/<your_token>... Example: https://192.168.1.179/33196680
- mega_webswitch.css
Change the UI only if you know what you are doing... :P
- mega_webswitch.js
var textbank0 = ["HLAVNI PWR","3525 kHz","3600 kHz","3700 kHz","3775 kHz","OMP1-[5s]","OFF-1s","OPR","OMP2-[5s]","OFF-1s","OPR","ALPHA-ON-[5s]","OFF-1s","OPR","EMTRON-ON","OPR"];
var textbank1 = ["AL80b","H8K","VN-4.2-ON-1s","VN-4.2-OFF-1s","2x400","2xGU81","4xGU81","1xGU81","SB1000","MBst-ON-[5s]","OFF-1s","Velkoz-ON-1s","OFF-1s","L4B-1","L4B-2","L4B-3"];
var textbank2 = ["QRO1","QRO2","mH-20-ON-[5s]","OFF-1s","VN-5-ON-1s","OFF-1s","vH-20v-ON-[5s]","OFF-1s","vH-20z-ON-1s","OFF-1s","MLA","AL80A","MB2-ON-[5s]","OFF-1s","MB3-ON-[5s]","OFF-1s"];
var textbank3 = ["QRO1","QRO2","mH-20-ON-[5s]","OFF-1s","VN-5-ON-1s","OFF-1s","vH-20v-ON-[5s]","OFF-1s","vH-20z-ON-1s","OFF-1s","MLA","AL80A","MB2-ON-[5s]","OFF-1s","MB3-ON-[5s]","ServerOK"];

var togglebank0 = [[1,2,3,4],[6,7],[9,10],[12,13]];
var togglebank1 = [[]];
var togglebank2 = [[]];
var togglebank3 = [[]];


var secToken = 33196680;
This are the labels for each button per bank. togglebank0-3 are multi dymensional arrays. You can define as many groups per bank as you want. In the example, position 1,2,3,4 of bank0 are grouped together, so only one of this group can be stay on. while clicking another button of this group the other one is switched off. REMEMBER: Start counting by 0, not by 1! :P Because there is just 63, not 64, the last one of bank3 is not used... The secToken must be the same as your Key from the SecuGenerator.html and strToken in your config.cfg. It makes sense to change this Security Credentials from time to time...
You need help? We are here for you... Ask DM5XX (see contact) - we will never leave you alone...